Sell Your Time with Meeting Packages and Bundled Sessions
Charging for a single meeting works, but it keeps every interaction as a one-off. Your clients book, pay, and leave. When it's time for the next session, you start over again.
With Calendly, you can package your time into clear, structured offerings. So your clients can book a series of sessions, prepay in one step, and move through a defined experience instead of a string of disconnected meetings.
How this works (and what you'll set up with this guide)
Instead of selling time meeting-by-meeting, you'll build a small system:
- An Event Type — the session your clients are booking
- Stripe + Payments — how clients pay you, in one step
- A Meeting package — the bundle of sessions you're offering
- Automations — confirmations, reminders, and follow-ups around each session
Together, this creates a clean flow: offer → payment + booking → session → follow-up → next session.
Calendly features you'll use
Step 1: Define your offer (before you set anything up)
Make your time easy to understand and buy. You're not just selling time — you're selling a structured outcome.
Before clicking into Calendly, get clear on:
- What you're offering (consultation, coaching, service, etc.)
- How many sessions are included
- What clients walk away with
A few examples to anchor on:
- 3-session coaching package
- 5-session onboarding series
- Monthly advisory bundle
The clearer your offer, the easier every step that follows.
Step 2: Create the Event Type for your sessions
Treat your Event Type as the "product" your client is booking. Each session in the package will run on this Event Type, so it should make the value of the meeting unmistakable.
Head to Scheduling → Event types and create a dedicated Event Type for your paid session. Set:
- A name that signals the value (e.g., "60-min Strategy Session")
- Duration
- Location
- A short description that sets expectations
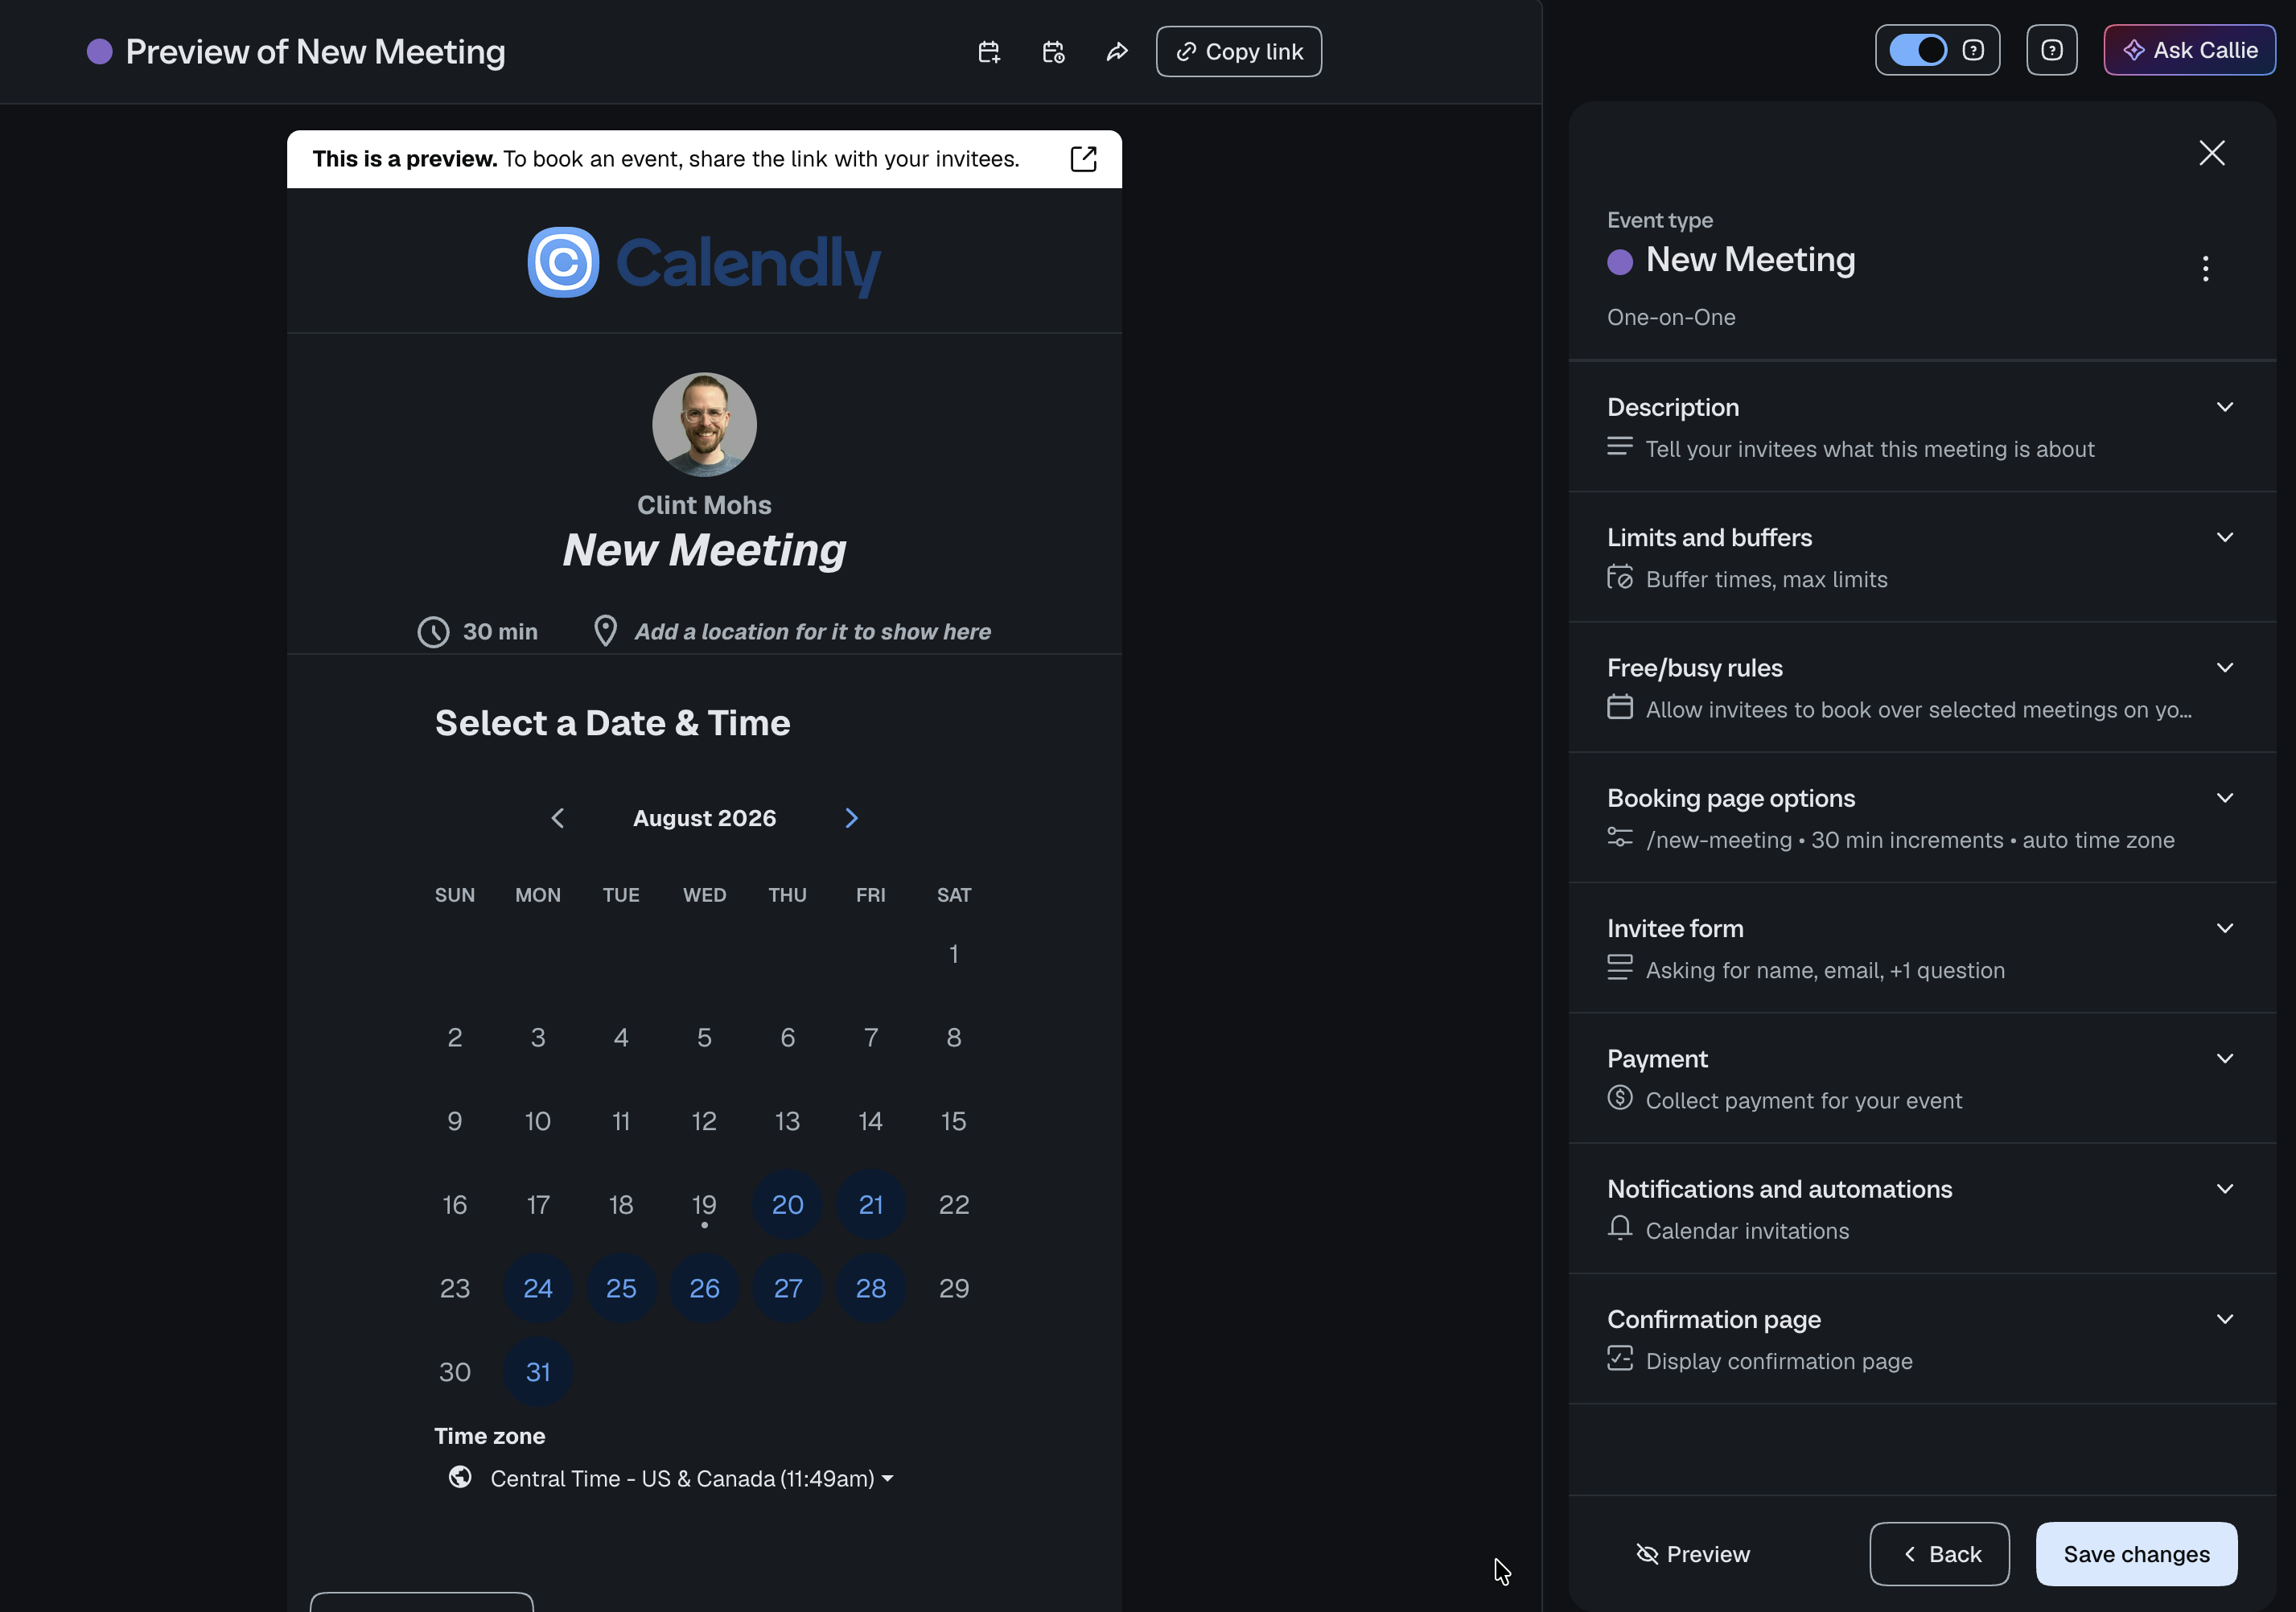
A few principles to keep in mind:
- Make the value clear in the name
- Use the description to explain what's included
- Keep setup simple — every session in the package will run on this same Event Type
Step 3: Connect Stripe/PayPal and Turn On Payments
Collect payment upfront so booking and payment happen in one motion, with no separate invoices to chase.
Go to Payments and connect your Stripe or PayPal account. Once your payment integration is connected, payments become available across Calendly's Payments features — Paid event types, Meeting packages, payment links, and invoices.
What this enables:
- Clients pay during booking, not after
- Payment is tied directly to the meeting
- No invoicing or follow-up payment links required
Step 4: Create your Meeting Package
Move beyond one-off meetings. A package gives clients a structured experience, increases commitment, and turns ad-hoc bookings into a defined engagement.
In Payments, click Create on the Meeting package card. From there, you'll bundle multiple sessions of your Event Type into a single offering that clients can prepay for, then schedule over time.
When you set up your package, you'll typically define:
- The name and details of the Meeting Package
- Which Event Type the package draws from
- How many sessions are included
- The total price clients pay upfront
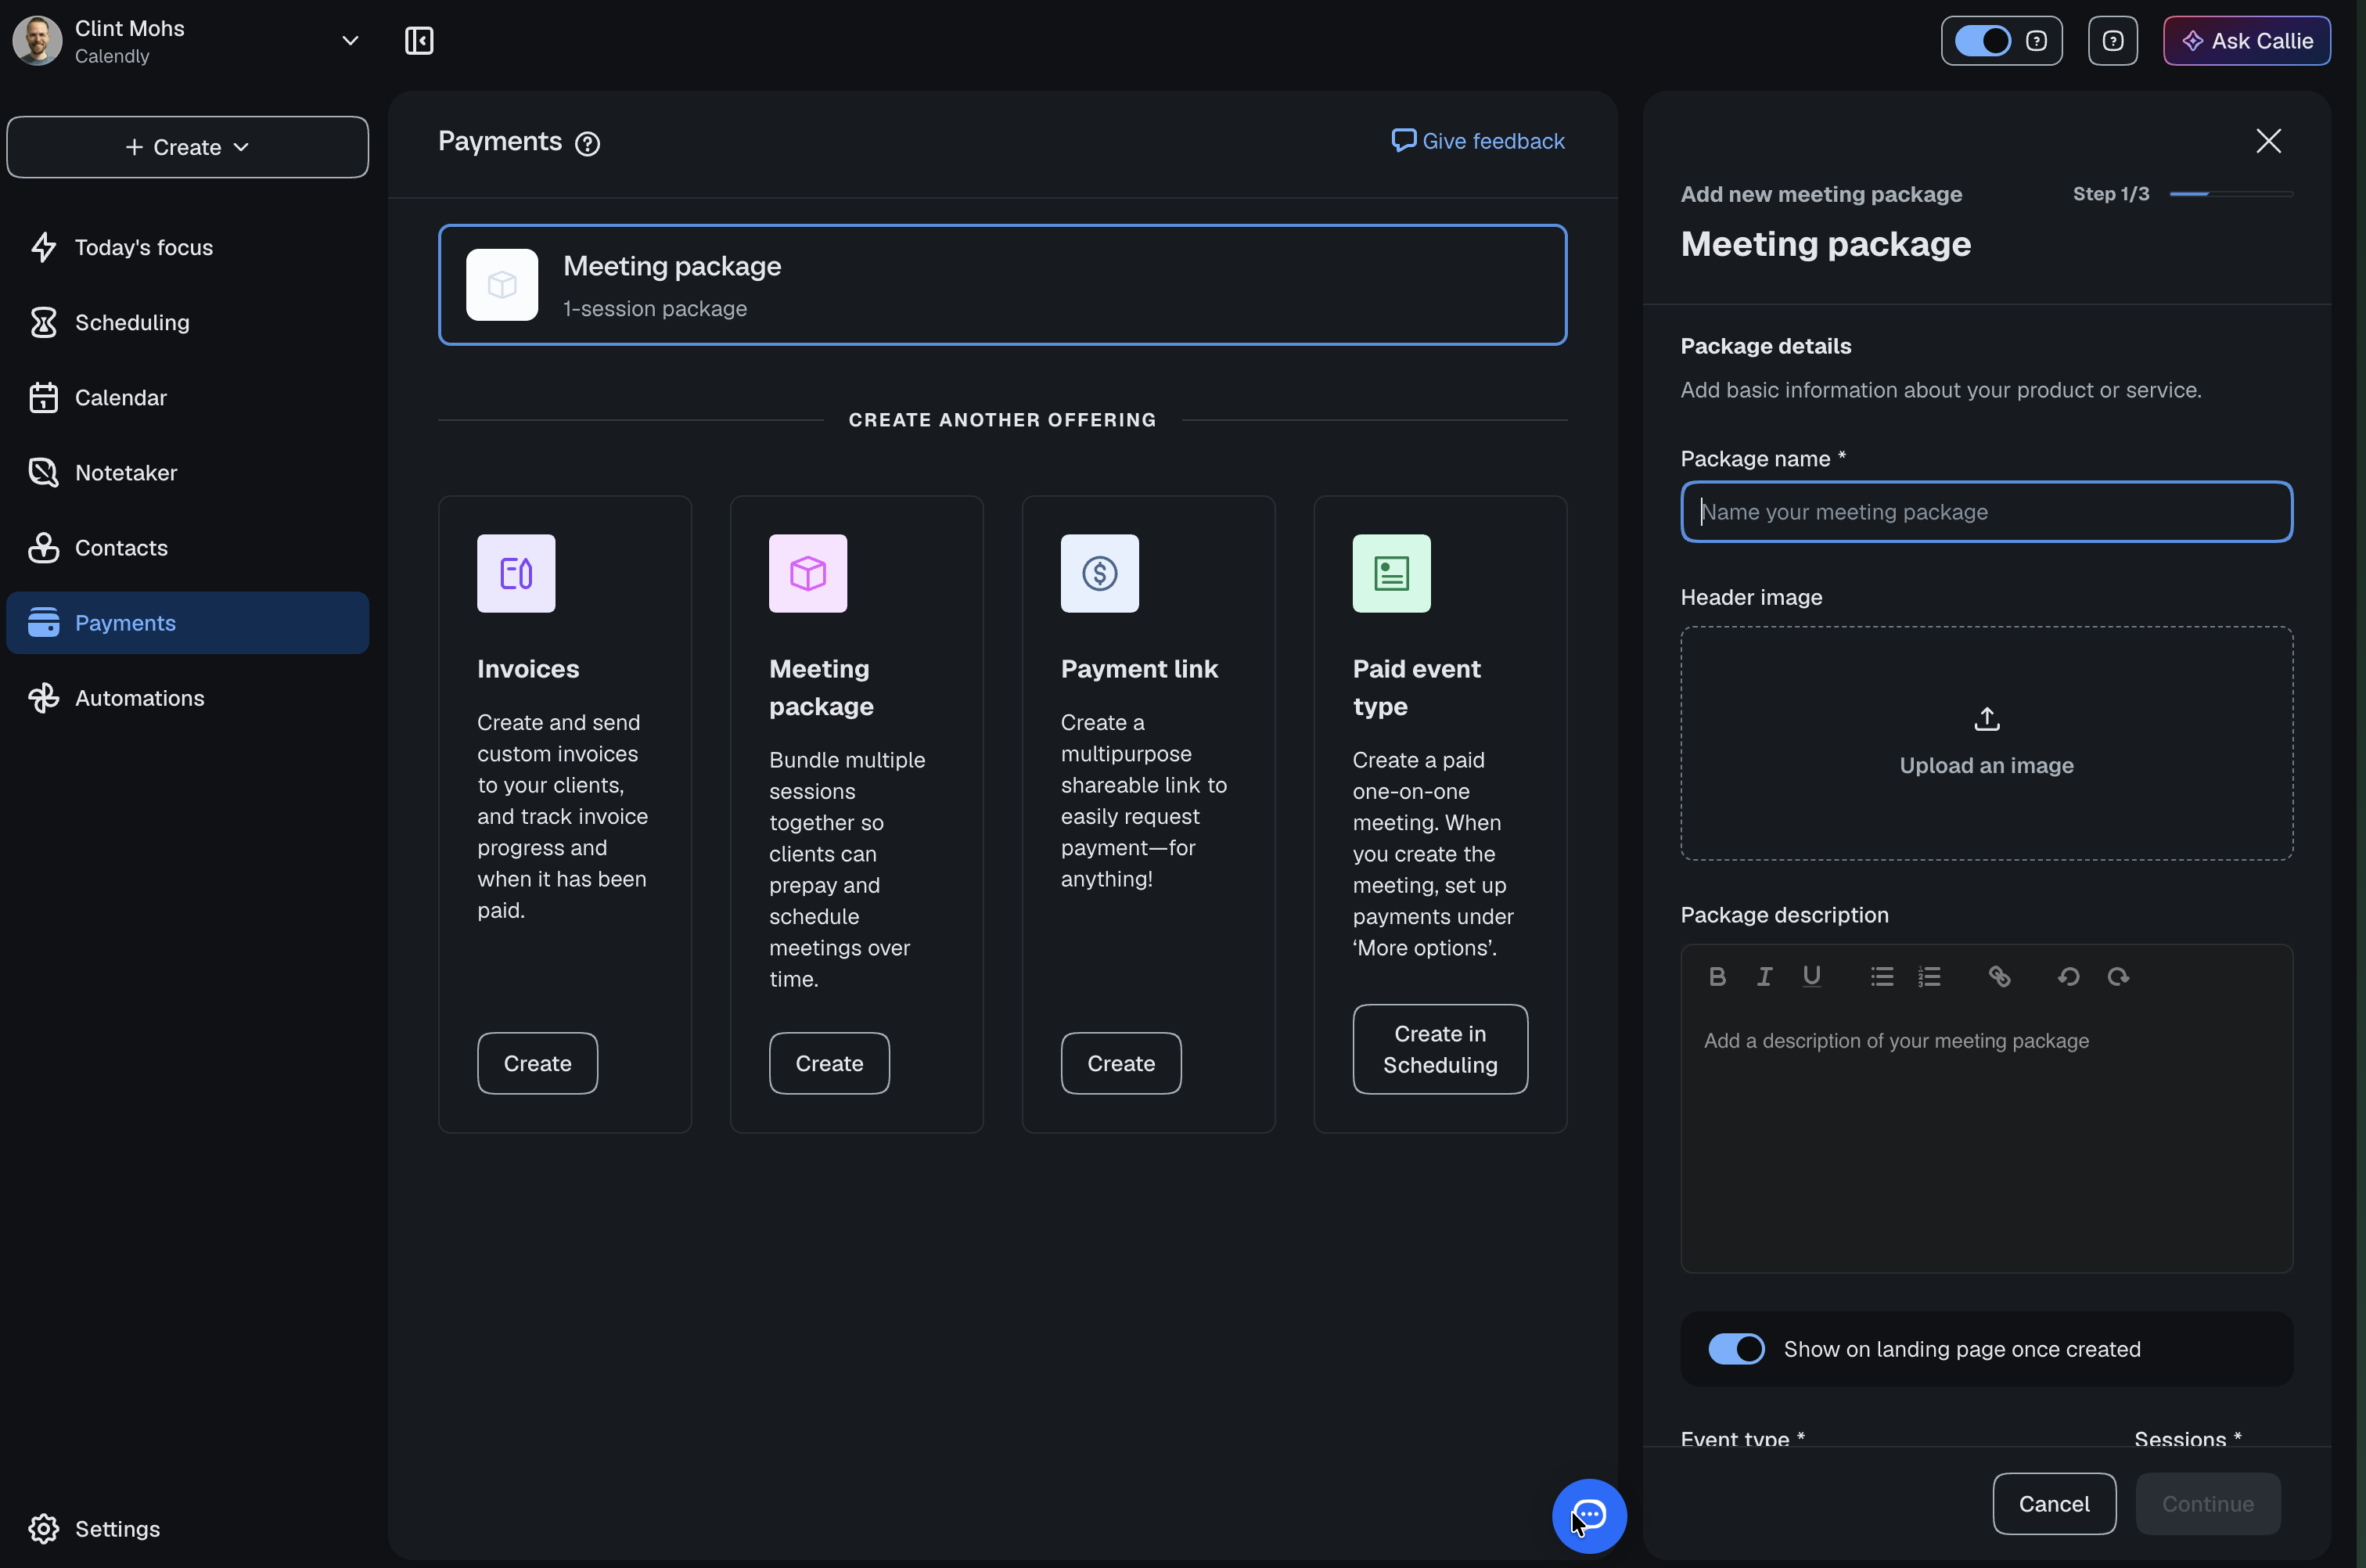
Once your package is live, clients pay once and then book each session as they're ready — no need to re-purchase or re-coordinate.
Step 5: Automate communication and session flow
Consistency is what makes a paid experience feel professional — not just the payment itself.
Use Automations to handle the moments around each session:
- Send confirmation emails after each booking
- Remind clients before each session
- Share prep materials or pre-reads
- Follow up after each session ends
A few things worth including in those messages:
- What to expect from the session
- Any preparation needed
- Links or resources
- The next step in the package
Assign the same Automation to your session Event Type and it will run for every session in every package — set it once, and let it run.
Step 6: Test your booking and payment flow
Make sure everything works the way you expect before you start sharing it.
Run through the full flow yourself:
- Buy the package as a client would
- Book a session from the package
- Confirm payment processed correctly
- Check the confirmation email
- Verify the session lands on your calendar
A ten-minute test now saves a frustrated client message later.
Step 7: Share and sell your offer
Start generating revenue from your setup. The easier it is to understand and book, the more likely people are to buy.
Your Meeting package has its own shareable link, just like an Event Type. Use it everywhere your clients already are:
- Email and direct messages
- Your website or landing page
- Your email signature
- Social profiles
When you share it, lead with the outcome — not the hours. "5-session leadership coaching engagement" lands harder than "five 60-minute meetings."